Saturday, August 29, 2009

BOO...Pretty Smitten Halloween designs now available!

Pretty Smitten Halloween..scary and spooky? Not really. Dark and icky? Definitely not. But...sweet, modern and fun...absolutely! Pretty Smitten Halloween is perfect for parties complete with bobbing for apples, carving jack o'lanterns, trick or treating and plenty of kids in costumes. These illustrations are available with either our scallop or round designs. If you don't see them in my Etsy shop yet, that's because I've had printer issues and I'm still catching up! Please just email me at prettysmitten@yahoo.com and I can set up a reserved listing. Happy Halloween!


Printer problems and Staples to the rescue!

Well, it was bound to happen at some point...my printer broke last Thursday! In between printing one order and starting another, my trusty Epson 1400 decided to begin printing a vertical line down every document. Not exactly the Pretty Smitten signature style I'm going for! I tried everything I could think of, ran the alignment option, cleaned the print heads, etc, etc...but nope, that dang vertical line kept showing up. I called Staples on a whim, since I originally bought my printer there, hoping they could do a repair. I really didn't want to take the time to send it back to Epson. But Staples did one better (actually like 5 better!!) they replaced my printer at no charge. I hadn't even bought the warranty on the first one. So now I have a NEW Epson printer and a warranty to go with it...yay! So thank you Staples!

Monday, August 24, 2009

Monday with Martha...

Martha...Martha Stewart of course! Who doesn't love her? And even if you can't stand her, I think (I know!) that you must still love her ideas....crafting, cooking, entertaining, decorating...her website is a one stop shop. The website that I just drool over though is Martha Stewart Crafts. It's complete eye candy for a crafty gal like me. Endless, boundless ideas. Browsing today I noticed a banner promoting her new punch around the page punches. My favorite is the loop punch, but a close second is the spider web punch...how perfectly creepy in time for Halloween!


Friday, August 21, 2009

And the winner is.....


Results were chosen from random.org and and our winner is....Jennifer!! Congratulations Jennifer! Please contact me at prettysmitten@yahoo.com and we can discuss your prize!

Thank you to everyone for participating in the giveaway. I'm just getting started in the blog world, so I'll take my 4 comments and be happy with them! Stayed tuned for another giveaway...I'm thinking at 100 sales? Any bets on when that might be? I started Pretty Smitten in the hopes to get 3 sales a week. This week I've had 7! So cross your fingers that I can continue (or increase!) this pace.

Thanks again, and I hope you are all enjoying my blog so far.


Thursday, August 20, 2009

Don't forget about our giveaway!


Okay I know I don't have a lot of readers yet...but for those of you who DO happen to click on my blog, don't forget to make a comment after this post for a chance to win a set of scallop note cards!

ENTER the GIVEAWAY HERE!

Pretty Smitten in Action: Monkey Themed First Birthday Party

I recently had the pleasure to work on a monkey themed birthday party for an adorable 1 year old boy named Luke. His mother was kind enough to send some pictures to share. Looks like he had a great party! The paper products can all be found in my shop and Luke's adorable bib and hat are from the Etsy store Golden Sew Cute. Thanks Jen for sharing!


Tuesday, August 18, 2009

New in my shop...Alphabet Prints!


I've been wanting to add these to my shop for a while, and yesterday with two Grandma's helping to watch Owen I finally got the chance! They say it takes a village....

I hope you like them as much as I do! I would love to know what you think!

And don't forget to check out our giveaway for your chance to win a set of personalized scallop note cards!


GIRL ALPHABET PRINTS:

BOY ALPHABET PRINTS:


Monday, August 17, 2009

Little Apple Design


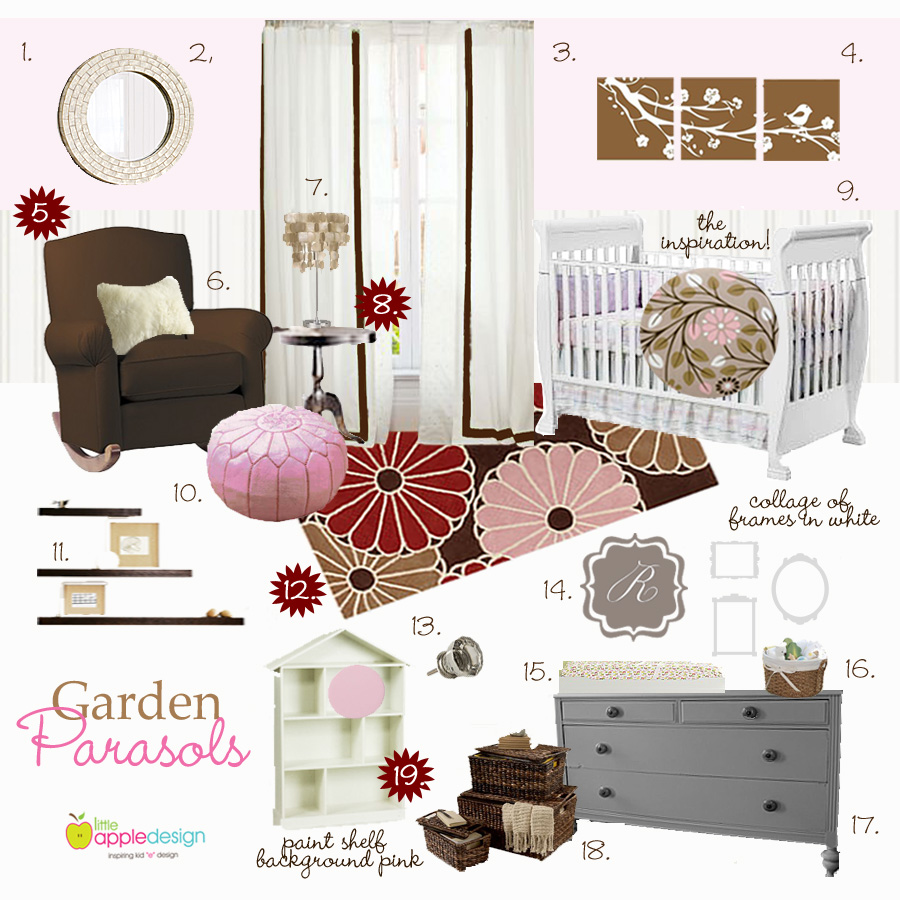
Today I had a few moments to read one of my favorite blogs, Project Nursery, and they have some exciting news! Their design business, Little Apple Design, has just launched a new website. Through an entirely online process, they help you design your child's room or nursery. Here's the deal...you send them pictures of your existing space and answer their online questionnaire. Within 10 days you'll receive an electronic design board, inspirational photos and shopping links. They even give you paint recommendations. So time to roll up your sleeves and get to work! Before you know it you have a room straight out of a design magazine! Such a great idea...I love the convenience of the online process and at $350 it's a lot cheaper then in person interior design service. I don't have any rooms to design at the moment but I'm still enjoying browsing some of their design boards in their samples section. Enjoy!

Saturday, August 15, 2009

50 Sales and Time to Celebrate with a Giveaway!


I'm quite pleased with my little shop, I hit 50 sales over the weekend! Yay! When I started dreaming about Pretty Smitten long ago, I had no idea if anyone would want to buy my designs. But now 50 people have and I couldn't be happier. So time to share the love with Pretty Smitten's first ever GIVEAWAY! Up for grabs is a set of personalized note cards. In true Pretty Smitten style you get to pick the illustration, colors and font. Just leave a comment (say anything you want!) and this Friday I will pick a winner via random.org. I hope to hear from you!


Monday, August 10, 2009

DIY Toddler Beds from Design Mom


I always love a good DIY project, and in the wonderful blog world there are often new ones to try. One of my favorite blogs, Design Sponge, recently featured a DIY toddler bed project from Gabrielle Blair of Design Mom. Super cute, and the best part?? Build TWO for $75. My little boy is only 9 months old but I will certainly be saving these directions for when it's time to move him to a toddler bed. Thanks Gabrielle!

Here are the directions, written by Gabrielle:

Part one: Build the base.

Materials to Build Two Beds (about $25):
-4 pieces plywood, 3/8″ thick. 10″ x 51″
-4 pieces plywood, 3/8″ thick. 10″ x 25″
(I had these pieces cut from one 4′x8′ piece of 3/8″ plywood that cost $8.)
-4 pieces of 2″ x 2″ wood. 48″ long
(I bought one 2 x 2 board that was 8′ long and had it cut in half. They are about $3 each.)
-2 pieces plywood, 1/4″ thick. 24″ x 48″
(These are typically available in this exact size for about $3 at Home Depot.)
-Screws #6, 1 1/4 inch.
(A box of 100 sells for about $5.)
-drill.

Directions:
-Make a rectangular box with the 10″ pieces of wood. Two short pieces and two long pieces. Attach with 3 screws on each side. This is easier if you pre-drill.
-On the long sides, make a mark at 2.5 inches along the outside and at 2 inches along the inside.
-Align one piece of the 2 x 2 inch wood so that the top hits just under the inside marks. Use clamps to brace or have a helper hold in place.
-From the outside of the box drill in along the 2.5 mark at 5 places along the rail. Repeat on other side of box.

-Lay 24 x 48 plywood on rails. Attach with 2 screws on each side.
And that’s it. The mattress will rest inside the two inch lip. Don’t worry if the box is a bit rough — if the screws aren’t perfectly aligned, etc. The box will be completely covered by fabric.

Before you start cutting wood, please read these notes on mattress size:
I didn’t include the price of the mattress in the project because most people in need of a toddler bed will already have a crib size mattress from their crib. If you do plan to use a standard crib mattress, you’ll need to make adjustments to the size of the base. Standard crib mattresses are 52″ x 26″, which will be a bit too big for this base. But be sure to measure the mattress you own. They vary.


Part two: The Upholstery.

Materials to Upholster (about $50):
-One full-size or queen-size package of hi-loft cotton batting
(This was $25 at JoAnns. Watch for sales or coupons and I’m sure you could get it cheaper.)
-About 4.5 yards of fabric. You could use much less if you don’t mind seaming it together. For each bed, you’ll need a strip of fabric 16 inches wide by 4.5 yards long.
(Fabric prices vary so much, that it’s hard to put this in a budget. In the $75 I mentioned in the title of this post, I’m allotting $25 for fabric. You could certainly spend more. And if you’re a bargain hunter, you could for sure spend less.)
-staple gun and staples

Directions:
-Roll out your cotton batting and fold over so you have a double thickness.
-Cut into 3 double-thick strips about 15 inches wide each. For each bed, you’ll use about 1 1/2 lengths of this double thick, 15 inch wide batting.
-Place the folded edge of the batting over the top edge of the bed frame. Attach it to the bed frame with a staple gun.

Trim the corners, so that you can attach them more securely.
-Keep wrapping the cotton around until your length runs out. Then add the next length.
-Turn the bed over and pull the batting tightly around the bottom edge. Staple away.

-Once the batting is secure, it’s time to add the fabric.
-Measure and cut the fabric so that you have a 16 inch wide piece that is approximately 4.5 yards long. You could also piece 16 inch lengths together to make one long strip.
-Starting on the bottom of the bed, staple the fabric over the cotton batting.
-At the corners, just fold and staple tightly.
-Once you’ve gone around the bottom, turn the bed over. Fold the fabric underneath itself so the edges don’t fray, and staple the fabric over the cotton on the top edge as well.

-Where the fabric joins, fold the edge underneath itself and staple tightly. I put my seam at the head of the bed — that way it’s hidden against the wall.

And that’s it. You’re finished! It’s an easy project to do in an afternoon. And you can’t beat that price for two darling toddler beds.


Wednesday, August 5, 2009

Scallop Borders

Pretty Smitten now has even more options! This morning I finally got a moment to add my scallop designs for the invitation sets and note cards to my Etsy shop. Same cute and modern children's illustrations, you pick the color and font to make it your own. And of course, two mini Swarovski crystals add a touch of sparkle and the Pretty Smitten signature look. So far I only have the invitations and note cards listed in my shop, but all products are available with the scallop design...so if you don't see what you want, please feel free to contact me! I hope you like them!


Monday, August 3, 2009

Back to School....



Hard to believe, but summer is half over and now everywhere I look there are Back to School signs. Even though my little guy is far off from starting school, I still can't help but think about when that day will come! Little backpack on and lunch in hand....oh my I almost get teary just imagining that day. What I will love, however, is all of those school supplies that we will get to buy! New paper, pencils, backpack, I love that stuff. I remember the first day of school, when we got to find our new desks and open the tops (yes, I had that kind of old school desk!) and find all of our new treasures....crayons, erasers, pencils...all brand new and ready to be used. Now in this economy desks are no longer magically filled and the parents are the ones doing most of the shopping! So here are some of my favorites for this year (for both child and Mommy), in case it's time for you to do some back to school shopping!

Not all backpacks need to have Dora the Explorer on them...here's a cute and modern option from Dwell Studio, the Gio Aqua Back Pack.
Some pretty pencils for Mommy's desk from See Jane Work...


And some colorful pencils from Paper Source for your little one too....


And my favorite...this non-toxic, non-solvent and acid free glue stick from Coccoina. Perfect for your little one's art projects. It works. It's green. And it smells like almonds!